Providing hands-on training for technical students and professionals is one of the toughest — and most important — tasks in technology. By providing a platform to create pre-configured virtual labs in the cloud, Azure Lab Services provides organizations with a solution to this problem.
In this article, to help you hit the ground running with this service, we’ll take a closer look at what Azure Lab Services is and walk through how you can set up your first lab.
What is Azure Lab Services?
Azure Lab Services is a managed service from Microsoft that enables organizations to set up classroom labs in the cloud easily and quickly.
Instructors can build Windows and Linux virtual machines (VMs) and invite students to access the labs from anywhere, any time. You can set up a lab by selecting VM size, operating system image, location, credentials, and lab policies to create a VM template.
Once published, the template replicates its contents to all students’ VMs in the lab. Time limits or time slots can restrict lab access. For example, students can have 15 hours of lab access, or labs can run only on weekdays from 10:00 AM to 2:00 PM.
Azure handles all infrastructure management for classroom labs, from spinning up VMs to managing errors and scaling the infrastructure. The creation and use of Azure resources in classroom labs occurs in internal Microsoft subscriptions, not your Azure subscription. Azure Lab Services keeps track of usage of these resources in the internal Microsoft subscriptions, and it gets billed back to the Azure subscription that contains the lab account.
Key Capabilities
Azure Lab Services supports the following vital capabilities:
- Rapid, on-demand lab setup
Instructors can build on-demand labs in Azure Lab Services to their needs. The service handles the underlying infrastructure, availability, scalability, and resiliency.
- Streamlined user experience
Students are invited to register for a lab with a registration code. Registered students can then access the lab from anywhere, anytime.
- Cost-efficiency and control
Instructors can set up lab schedules and hours to optimize costs for students to access the lab. Additionally, instructors can configure lab policies to automatically shut down and start up lab VMs.
Use Cases
Organizations can use Azure Lab Services for various scenarios, including:
- Students VMs
Build a classroom lab in the cloud and give students the required access to work on school, homework, or personal projects.
- Research VMs
Use the small or medium GPU VMs to set up a compute-intensive or graphics-intensive analysis lab.
- Physical lab replacement
Scale, automate lab operations and save money by moving physical labs to the cloud.
- Hackathons
Host a hackathon in Azure Lab Services. Setup VMs, invite participants, control usage, and delete the lab once completed with ease and simplicity.
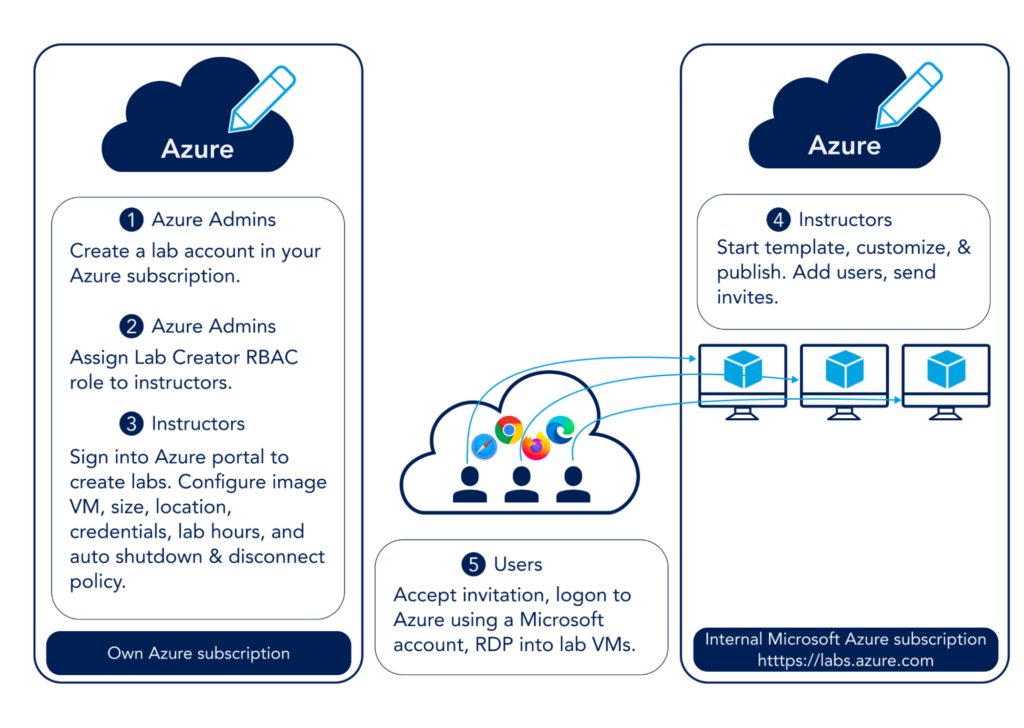
Example Azure Lab Services classroom setup
The figure below illustrates the steps required to set up a classroom lab in Azure. The high-level steps are:
- Azure admins create a lab account in Azure
- Azure admins assign the RBAC role “Lab Creator” to instructors
- Instructors develop the required labs
- Instructors customize and publish a template VM and invite users
- Users get email notifications to register, sign in, and access the lab
The first three steps occur in your Azure subscription, but the Azure labs are created in internal Microsoft subscriptions.
Azure Lab Services vs. Azure DevTest Labs
Azure Lab Services and Azure DevTest Labs are the two Microsoft services that can set up lab environments in Azure. Azure Lab Services provide managed classroom labs, while Azure DevTest Labs provide development and test environments in the cloud.
The two lab services provide fast, easy, and flexible lab setup, streamlined lab user experience, and cost optimization and analysis. The critical difference is that Azure DevTest Labs support continuous integration/deployment (CI/CD) integration and embedded security.
Azure Lab Services manages the lab infrastructure behind the scenes. Instructors focus on creating and developing labs for students. On the other hand, instructors need to address all infrastructure work with DevTest Labs.
The table below compares key management features of Azure Lab Services and Azure DevTest Labs[1]:
| Feature | Azure Lab Services | Azure DevTest Labs |
|---|---|---|
| Azure Infrastructure Management | Built-in infrastructure scaling and resiliency for classroom labs | Lab owners can self-manage and customize infrastructure |
| Infrastructure resiliency | The service handles infrastructure resiliency | Lab owners handle infrastructure resiliency |
| Subscription management | Service handles resource allocation in internal subscriptions | Lab owners manage in their own Azure subscription |
| Autoscaling | The service handles | No autoscaling |
Getting Started with Azure Lab Services
Now that we know the basics let’s walk through working with Azure Lab Services.
Lab Account Creation
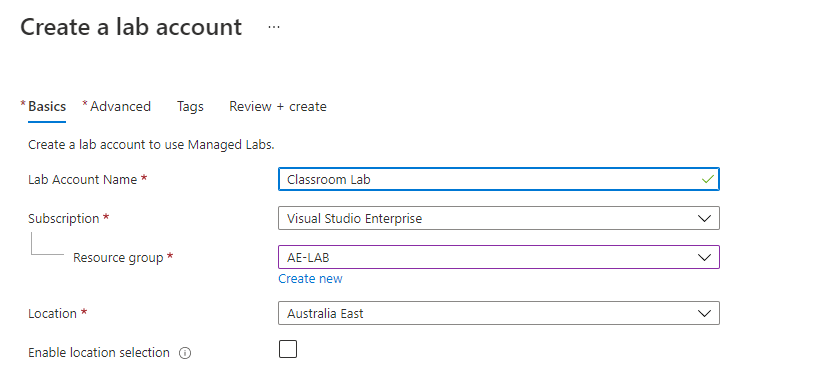
To start, you must create a lab account in your Azure tenant. The lab account serves as the central account in which all labs in the organization are managed.
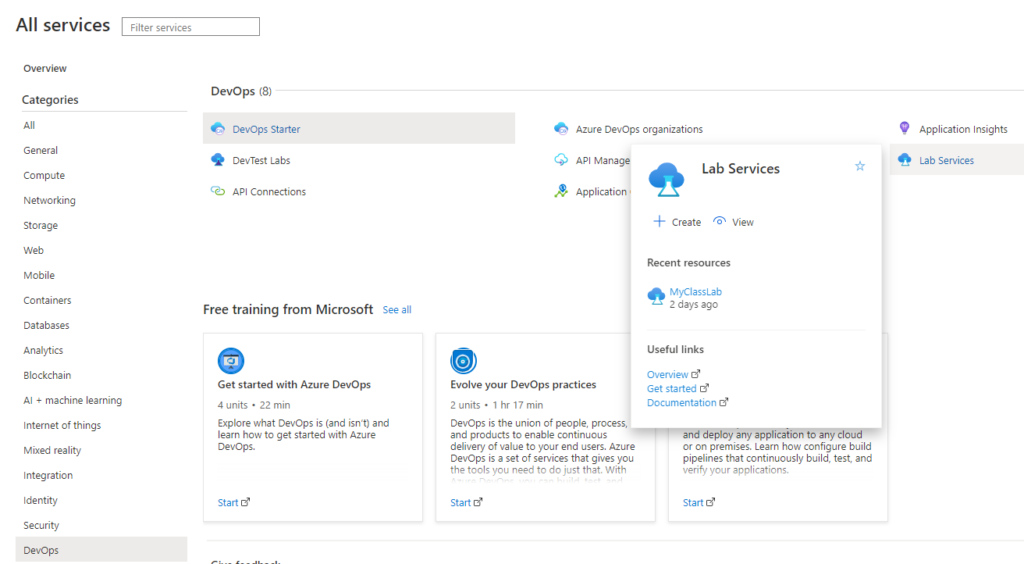
Sign in to the Azure portal, select All Services, then select Lab Services in the DevOps section.
On the Basics tab, enter a name for the Lab Account Name, select the Azure subscription in which you want to create the lab account, create a new or select an existing resource group, and select a location where you want the lab account to be created.
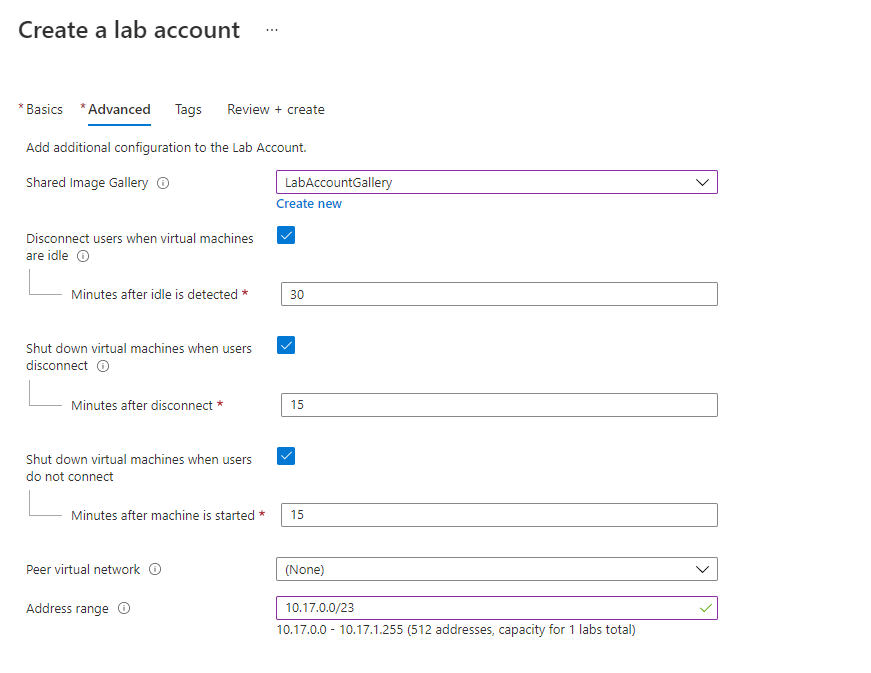
Create a new shared image gallery or select an existing one on the Advanced tab. Specify the VMs’ auto disconnect and shutdown policies. The defaults are to disconnect users after 30 minutes of inactivity, shut down VMs after 15 minutes of users disconnecting, and shut down VMs if users do not connect for 15 minutes.
To connect resources in the lab to internal resources in your subscription, configure a peer virtual network (VNet) for the lab network.
Specify an Address range for VMs in the lab. For example, 10.20.0.0/23. The prefix must be smaller than or equal to 23. The /23 prefix will allow for 512 addresses, which is a capacity for one lab.
There are two key role assignments in Azure Lab Services: Lab Owners and Lab Creators. Lab Owners have full access to manage all resources, including the ability to assign roles in Azure role-based access control (RBAC).
Lab Creators can create new labs in the account. As a best practice, assign the Lab Creator RBAC role to instructors or trainers in your organization.

Lab Creation
Instructors assigned the Lab Creator RBAC role can create labs when they sign into the Azure Portal. To create a lab, first click on Create a lab

On the New Lab page, enter a name for the lab, select a VM image, size, and lab location.

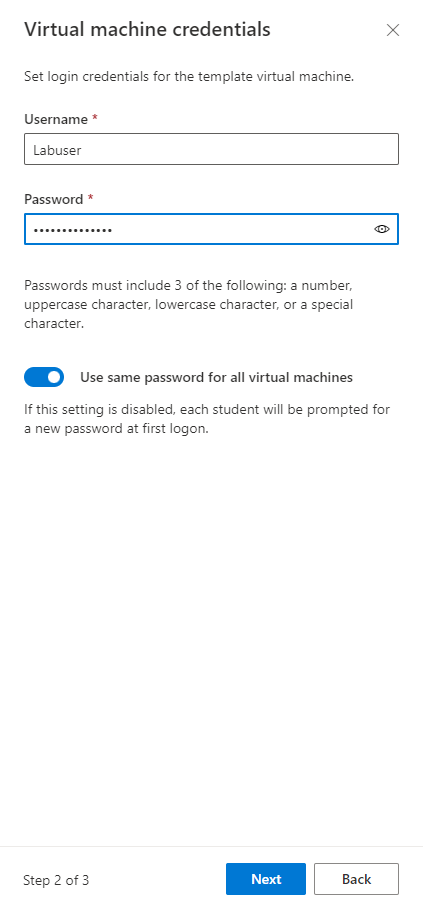
On the Virtual machine credentials page, enter a Username and a Password, and specify whether all VMs should use the same password or if students will be prompted for a new password at first login.
The Lab policies page specifies the lab hours available to each user outside of scheduled events. The default is 10.
Automatic shutdown and disconnect policies are the same as those defined for the lab account. You can apply lab account policies to all labs, or each lab can have its policies. The defaults are:
- Disconnect users when VMs are idle for 30 minutes
- Shutdown VMs after 15 minutes of users’ disconnect
- Shut down VMs when users do not connect for 15 minutes after VM is started.
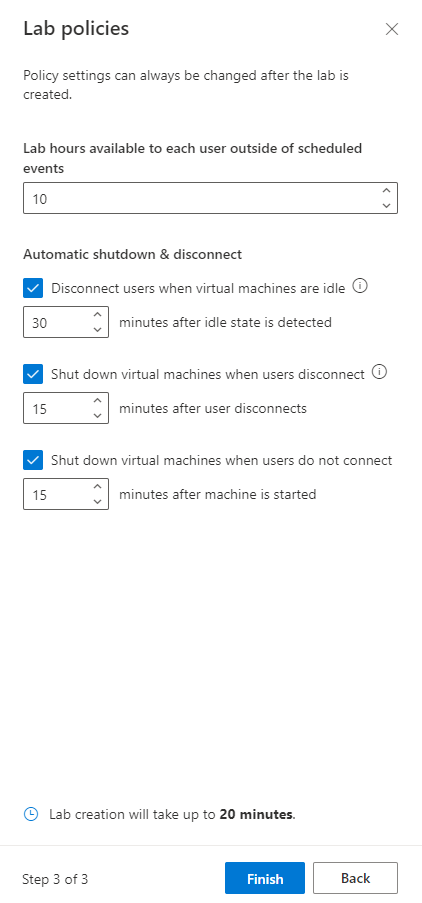
Once all configurations are set, click on Finish. Lab creation will take up to 20 minutes.
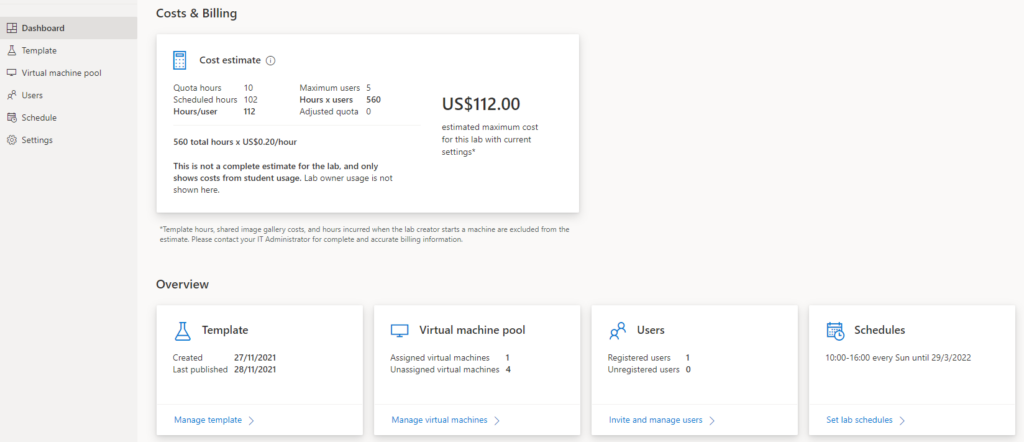
Lab Dashboard
The lab dashboard provides an overview of cost estimates, templates, VM pool, users, and schedules. It also gives lab instructors the ability to manage templates and VMs, invite and manage users, set lab schedules, and modify lab policies.
Template VM- Customize
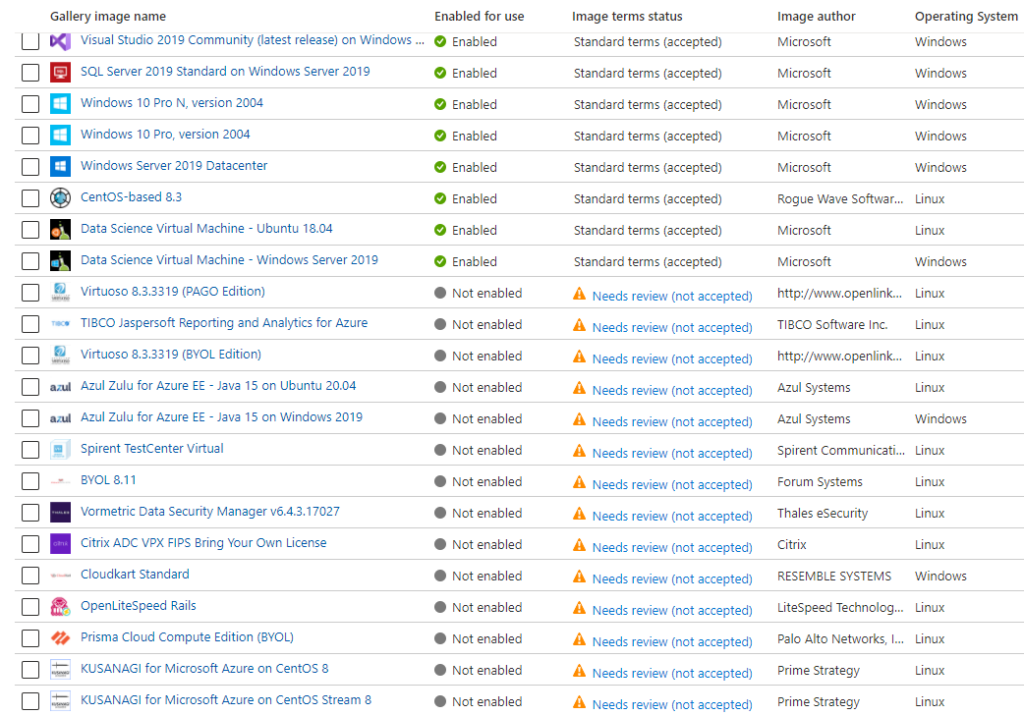
A template VM is a base image from which all other VMs in the lab are created. You can build templates from the marketplace or shared image galleries. There are dozens of images in the marketplace; however, only eight are enabled at writing. The disabled images are still under review and may be enabled in the future.
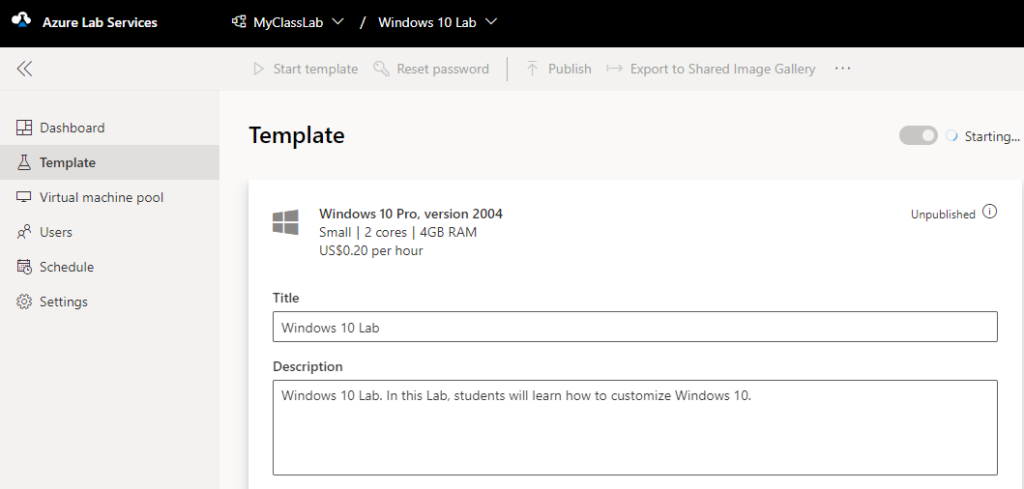
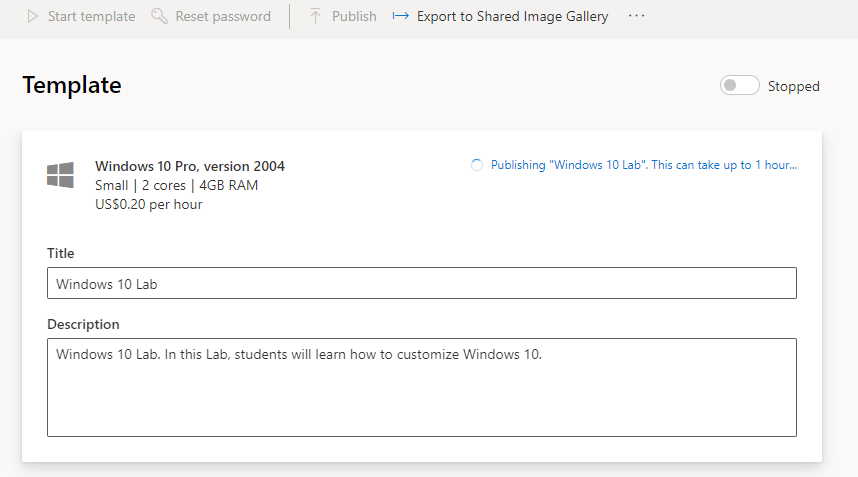
For this lab, we selected “Windows 10 Pro-version 2004”. This image is the default installation of Windows 10. This base image needs to be customized for lab requirements before it’s provided to students.
After creating a lab, the template’s default state is Stopped and Unpublished. Click on Start template to connect to the VM to customize.
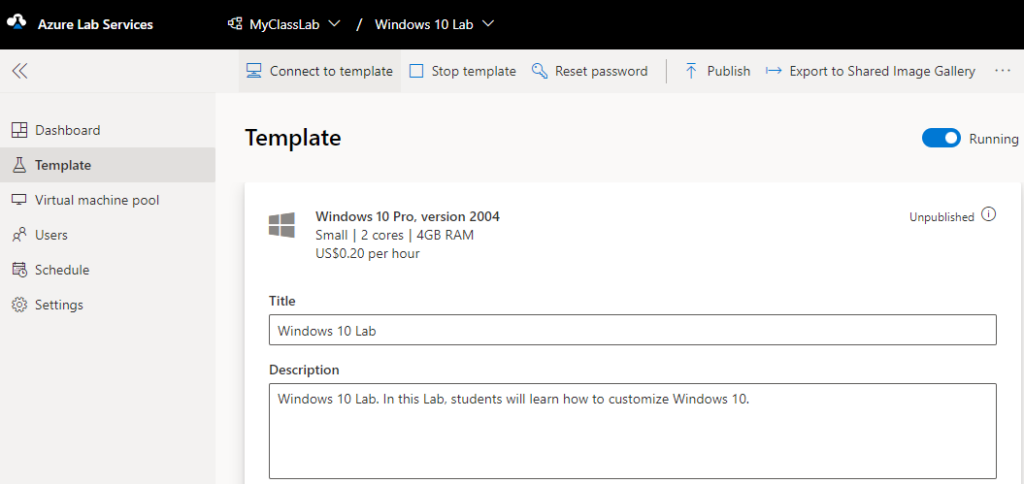
Once the template is running, click on Connect to template.
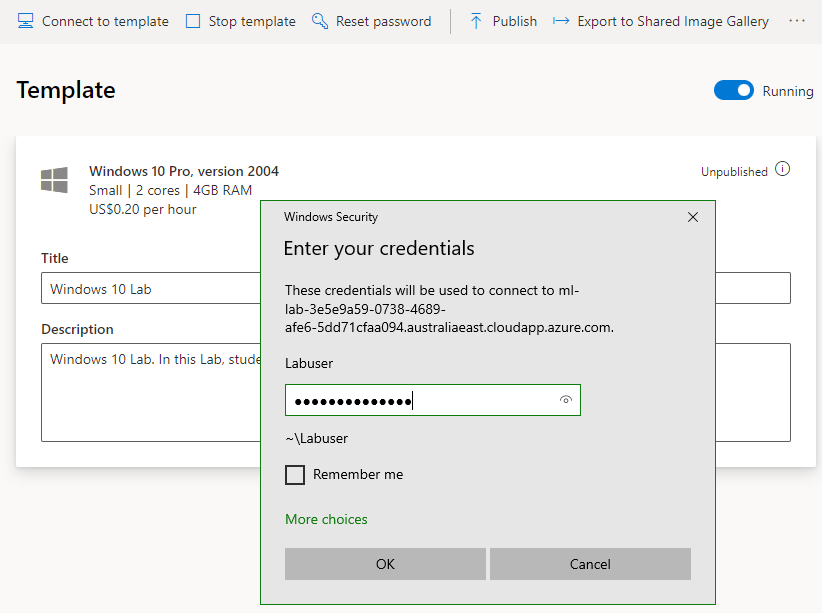
The Connect to template action will download a VM’s RDP file. Click on the file to launch the Windows Security; enter your credentials window. You will be prompted to enter the password for the lab user account.
Once connected to the VM, customize as required. For example, install the necessary software change settings. Once completed, shut down the VM.
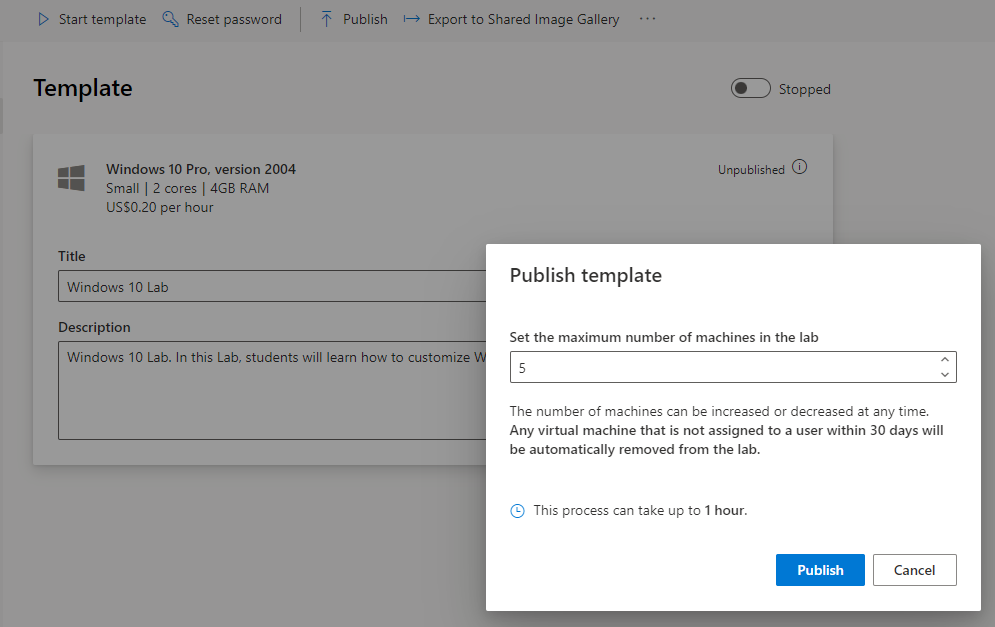
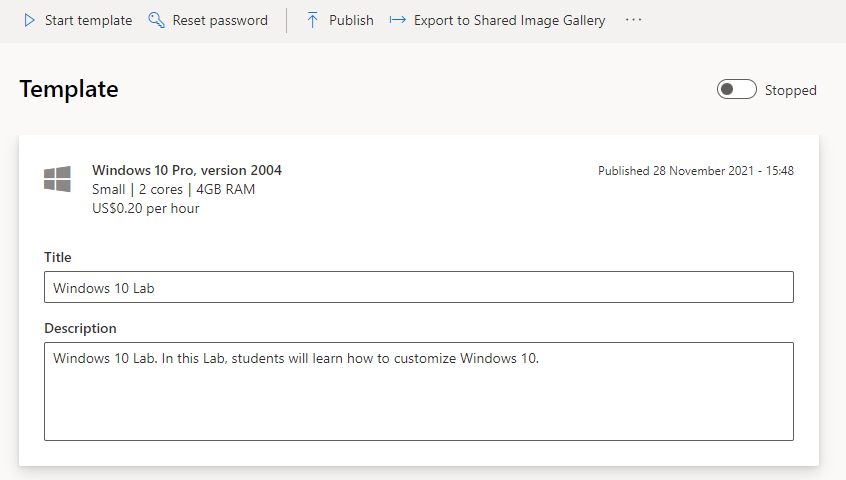
Back to the Azure Lab Services portal, click on Stop template. The template VM is now ready for publishing.
Template VM- Publish
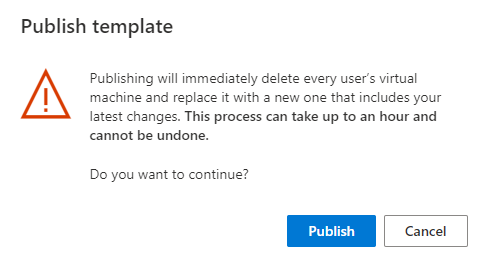
Publishing a template VM will create VMs using the updated template in the lab. All VMs will have the same configuration as the template. When you publish the template VM for the first time, you will be asked to set the maximum number of VMs in the lab. This number can be increased or decreased later if required. Azure Lab Services warns that it will remove VMs not assigned to users within 30 days. It also warns that this process can take up to 1 hour.
Subsequent template VM publishing triggers a warning from Azure Lab Services that this process can take up to an hour and cannot be undone
Click on Publish
The template VM is now published and ready for users to access.
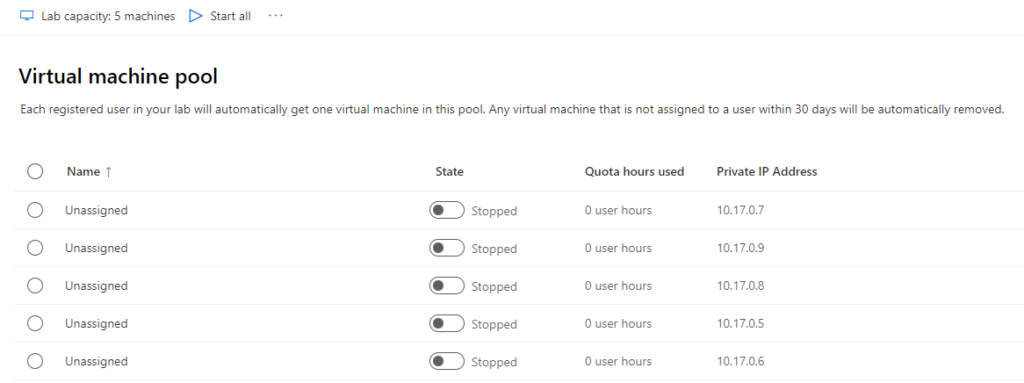
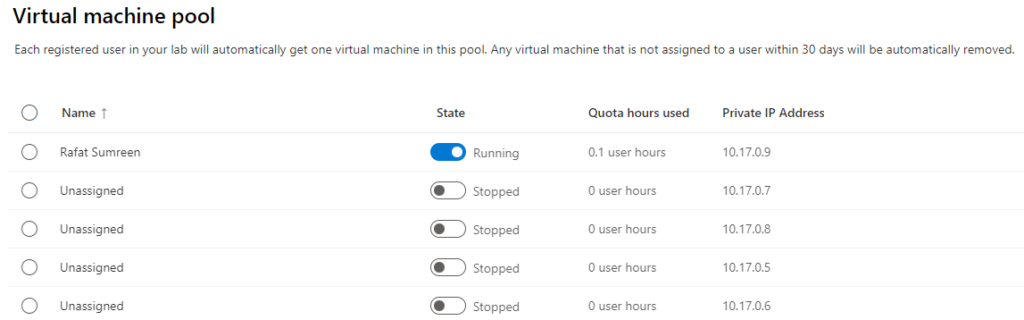
Virtual Machine Pool
The virtual machine pool shows the number of VMs configured in the lab, registered users, quota hours used, and VMs’ private IP addresses. You can also increase or decrease capacity and start all stopped VMs.
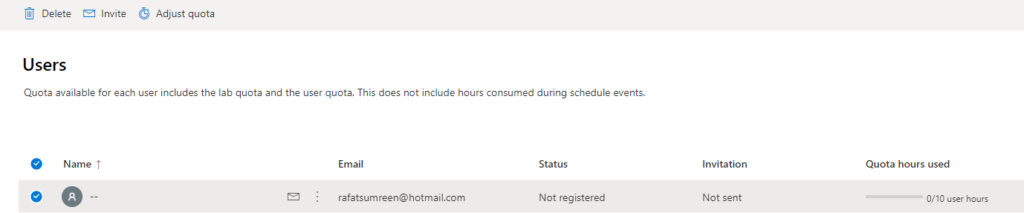
Users
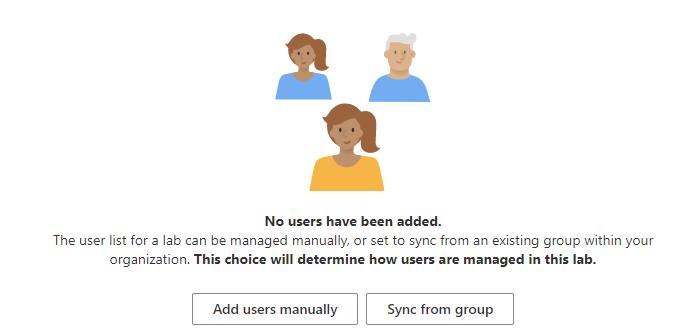
The Users tab provides the lab instructors with the ability to add users, reconfigure quota per user, and restrict access to the lab. The first time you access the users’ tab, you can Add users manually or Sync from group.
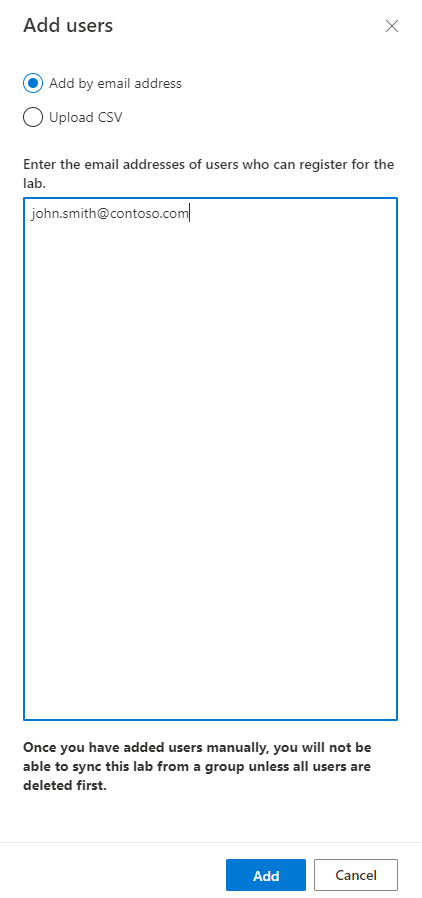
The Add users option allows instructors to manually enter users’ email addresses or upload a CSV file for bulk add.
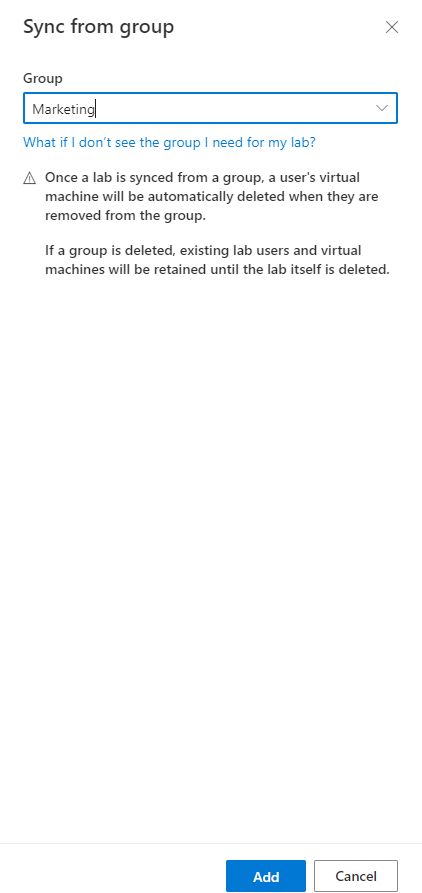
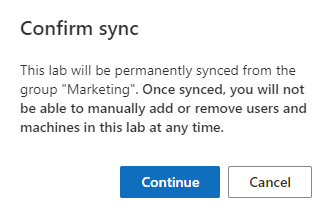
The Sync from group option allows instructors to select a security group where its members are synchronized from Azure AD to Azure Lab Services and added to this lab as users. Be careful of group and user removal actions in Azure AD and their impact on the lab.
Note that Add users manually and Sync from group are mutually exclusive options. Once an option is selected, the lab will only use that option moving forward. The message below is displayed when selecting a group sync option.
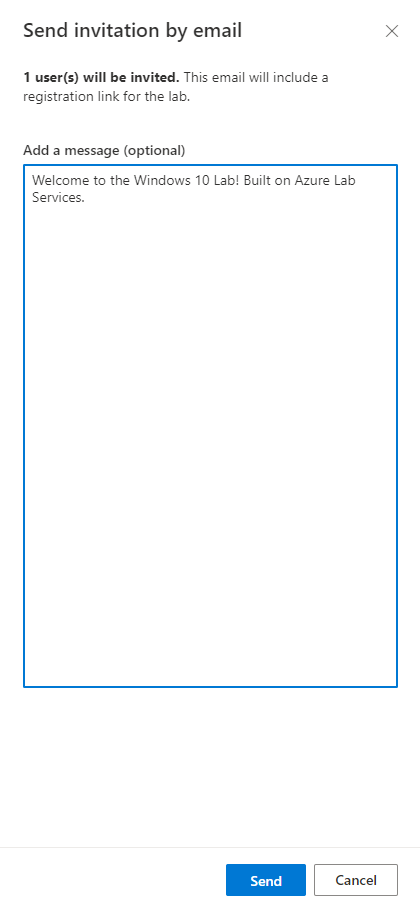
Instructors need to invite users to the lab, and the way to do this is by sending email invitations to the users.
Email invitations will include a registration link for the lab. Instructors can also add optional messages to invitees.
Lab Access
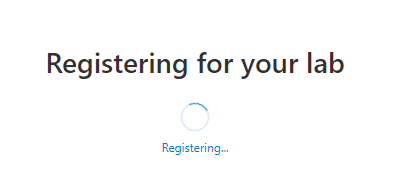
Users will click on Register for the lab link in the email invitation and be asked to log in using their Microsoft account credentials.
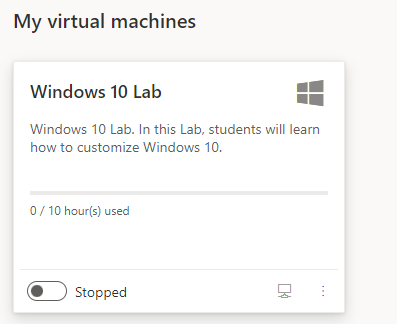
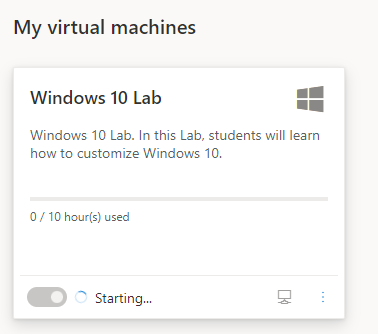
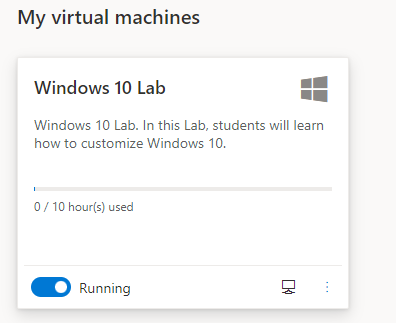
Once logged in, users will see a My virtual machines window with their registered labs. In the example below, it is the Windows 10 Lab. Depending on the hours used and remaining, users will need to tab the toggle Stopped switch to the right to start the VM, click on the computer icon on the right-hand side to download the RDP file, and connect to the VM.
Pricing
Azure Lab Services charges only for active VM usage. The billing is based on lab units, which bundle compute, networking, and storage components of the VM. Depending on how many lab units are used, a VM is billed hourly.
Lab units are priced the same. However, how many lab units a VM consumes varies and depends on VM sizes.
Lab Units cost $0.01 per hour. Instance size determines how many lab units are consumed for each VM in a lab. The table below shows instance sizes and corresponding lab units:
| Instance Size | Lab Units |
|---|---|
| Small (2 core(s), 3.5 GB RAM) | 20 |
| Medium (4 core(s), 7 GB RAM) | 42 |
| Medium (Nested Virtualization, 4 core(s), 16 GB RAM) | 55 |
| Large (8 core(s), 16 GB RAM) | 70 |
| Large (Nested Virtualization, 8 core(s), 32 GB RAM) | 84 |
| Small GPU (Compute, 6 core(s), 56 GB RAM) | 139 |
| Small GPU (Visualization, 6 core(s), 56 GB RAM) | 160 |
| Medium GPU (Visualization, 12 core(s), 112 GB RAM) | 408 |
Instance size and lab units
For example, a running Small (2 cores, 3.5 GB RAM) Windows VM instance costs $0.20/hour. A running Medium (Nested Virtualization, 4 cores, 16 GB RAM) Linux VM costs $0.55/hour.
A lab of 10 students with 10 hours weekly quota assigned to each student will cost $80/month if the instance size is Small (2 cores, 3.5 GB RAM). The same lab will cost $220/month if the instance size is Medium (Nested Virtualization, 4 core(s), 16 GB RAM).
The equation used to calculate the cost of the above labs is (Number of students * Number of monthly hours) * (number of lab units * 0.01).
- For a Small lab: (10 * 40) * (20 * 0.01) = $80
- For a Medium lab: (10 * 40) * (55 * 0.01) = $220
Limitations
There are a few limitations with Azure Lab Services, including:
- Today, Classroom labs are the only managed labs available.
- There are 10s of VM images in the marketplace that can be used as template VMs. However, only eight are enabled at the time of writing. The disabled images are still under review.
- Only ten instance sizes are available at the time of writing. These include Small (2 cores, 3.5 GB RAM), Medium (4 cores, 7 GB RAM), and Large (Nested Virtualization, 8 cores, 32 GB RAM).
- The time it takes to create a lab, start, and publish a template VM is considerably long.
- Azure Lab Services has default capacity limits on Azure subscriptions to adhere to Azure Compute quota limitations.
Conclusion
Azure Lab Services helps organizations build classroom labs in the cloud easily and quickly. Students can access the labs from anywhere, any time. As a result, Azure Lab Services can be one of the most operationally efficient mechanisms for customized online learning in technical environments.
You like our article?
Follow our monthly hybrid cloud digest on LinkedIn to receive more free educational content like this.